Illuminating the Box

May 12, 2021 - this page is being updated.  Check back for new content.  Thank you! ❤

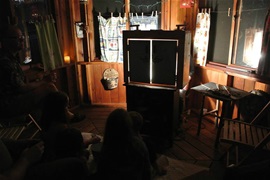
Suspense! This is Dejah Leger's crankie box with the wonderful doors. We were getting ready to rehearse for one of the many Seattle Crankie Fests.

When I am performing outdoors at summer festivals (we will get back to that!) during the day, obviously, I do not backlight the scroll.  But when performing in a low light situation, either indoors or outdoors, I do love to backlight the scroll. It helps the viewer focus on the crankie and eliminates potential visual clutter around the box.

The amount of light you need depends on the thickness of the scroll.  A thin, translucent parchment paper needs less light than two thicknesses of felt.  If the light is too strong, you will get a "hot spot" in the middle of the screen. Not enough light, and images will be hard to see. You may need to experiment with different wattages of bulbs.

There are lots of different ways to light the box. After ten years of crankie performing, this is what I have learned and this is how I do it. Cheap and simple!

- a cheapo clamp light from the hardware store

- an LED lightbulb will give you a more diffuse light, less likely to have a "hot spot" in the middle which "lights out" the image.

- for Tyvek scrolls I use a 25 Watt LED light bulb. For thicker felt scrolls, I use a higher wattage. You can also connect a dimmer switch to the clamp light to adjust the light.  Make sure the LED bulb is marked "dimmable."

- I angle the clamplight towards the bottom of the crankie box, not perpendicular to the scroll which is more likely to create a hot spot.

Clamp lights are the easiest way to backlight a crankie. They are inexpensive and readily available at any hardware store. They clamp easily to the ceiling of the box. This is Katherine Fahey's crankie box. That's Katherine at the crank and a friend behind the box with a shadow puppet.
Marking the Back of the Scroll
When backlighting a paper or Tyvek scroll, the crankist may not be able to see where they are in the story. Mark the back of the scroll so that the shadow puppeteer knows where to place the puppets. PLEASE NOTE: mark carefully so that the marks do not show through to the front. In this example, I have black cutouts glued to the scroll (see below). By putting the scroll down on a light board, or taping it to a window, the images will show through so that you can mark the back. To mark the back of the scroll, lay the scroll down on a light board or tape the scroll to a window on a sunny day, to be able to see the images on the other side.
View from the front.
Using a Dimmer Switch
CHEAP THRILLS! Using a dimmer switch + thunder maker! The clamp light plugs into the dimmer switch which is available at hardware stores. Make sure the bulb you put in the clamp light is dimmable. Here I am using a Sylvania 25w (Tyvek does not need a lot of wattage) soft white Opale bulb.

LIGHTING INSPIRATION!

Lady Margaret Crankie by Sandi Green-Baker
This whole thing is so well done, especially the lighting. Sandi used a combination of lights/techniques. She's going to send a description of how she did this and I will post here. Stay tuned!
The Lost Gander by Anna & Elizabeth
This was filmed in 2012 outdoors at night in the woods!! They had a narrow "light window" to work with. Not too much light but not pitch dark either. You will see in the middle of the film, that they have the crankie box filled with candles. That's very brave. The light is created is beautiful. Crankie magic.
HISTORY NOTE
This is 19th century toy moving panorama from the collection of Professor Erkki Huhtamo. As you can see, a candle was used to illuminate and there is a smoke hole in the ceiling of the box. The paper is translucent so that the candle light can shine through. erkkihuhtamo.com

This page was created in 2013, updated 2019. In the process of updating again in 2021 ❤